
The square knot (SK) is one of the first macrame knots you should learn as a beginner, and thankfully it’s also one of the most useful.
There are so many things you can make with just a square knot, from bracelets and keychains to plant hangers and wall hangings.
Here’s a simple macrame square knot tutorial with photos to help you get started, plus a few variations to take your work to the next level.
Affiliate disclosure: Articles on Tiny Workshops may contain affiliate links.
How to tie a macrame square knot
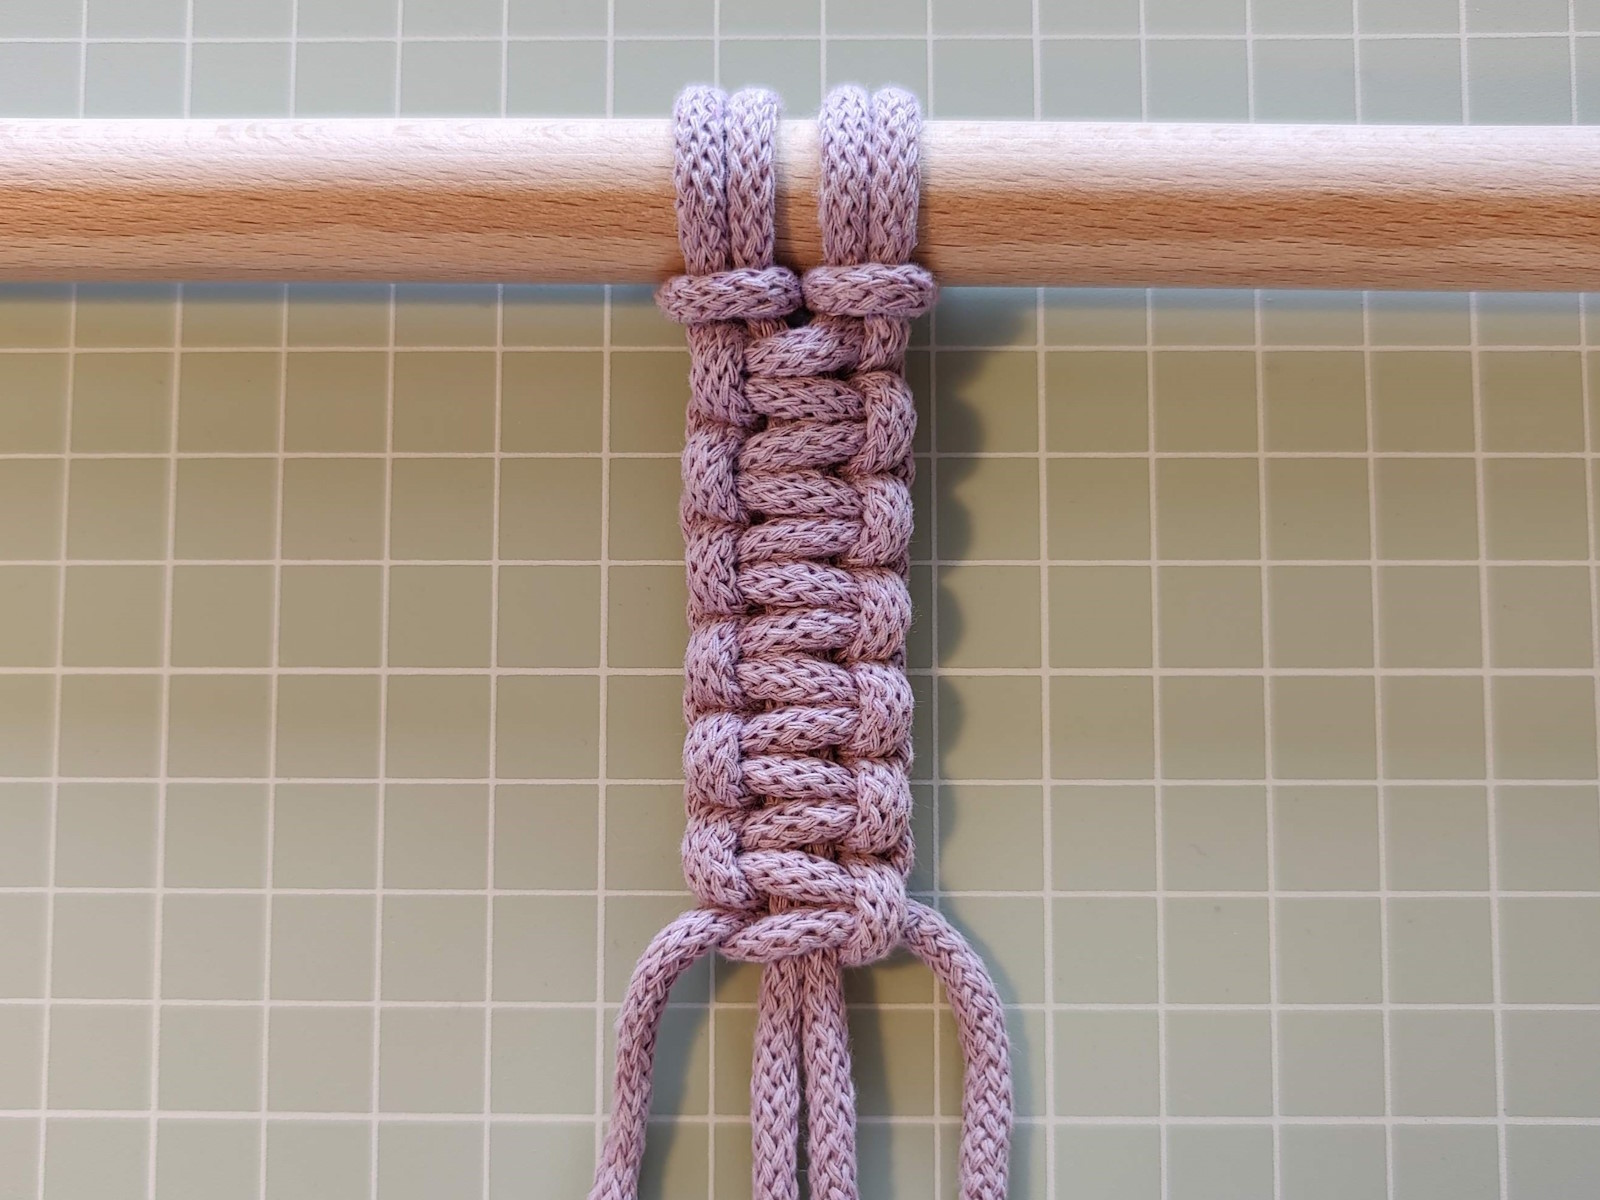
For this macrame square knot tutorial the only thing you need are four strands of macrame cord and a rod or something to tie them to. I’ve used a braided cord from Bobbiny tied with a lark’s head knot for simplicity, but any cord will do.
If you want to learn more about what materials we recommend, check out our in-depth guides to macrame cord and other macrame supplies!
Let’s get started!

Step 1
Bring the left cord over the two center cords, then under the right cord, forming the number 4.

Step 2
Bring the right cord under the two center cords, then pull it through the eye of the number 4.

Step 3
Pull your cord tight to form a half square knot.

Step 4
Now we’ll mirror the steps to complete the square knot. Bring the right cord over the two center cords, then under the left cord, forming a backwards number 4.

Step 5
Bring the left cord under the two center cords, then pull it through the eye of the backwards 4.

Step 6
Pull your cord tight to form a full square knot.
And that’s it! You can repeat the steps as many times as necessary to main a chain of square knots, which is the basis for a lot of simple macrame projects.
Keep reading for a few more macrame square knot patterns and techniques.
How to tie a spiral using macrame square knots
One of the most iconic macrame patterns is the spiral, and now that you know how to tie a square knot, you know how to made a spiral, too.
Here are the steps to get you started, although they’re mostly the same as what you’ve already seen.

Step 1
As above, bring the left cord over the two center cords, then under the right cord, forming the number 4.

Step 2
Bring the right cord under the two center cords, then pull it through the eye of the number 4. Tighten your cord to make a half square knot.

Step 3
Rather than mirroring the steps above, repeat them using the left cord first.

Step 4
Repeat the process to create a longer spiral pattern.
Note that starting with the cord on the right-hand side will reverse the direction of the spin.
How to add extra cord using a square knot
If you only have two cords to work with or want to incorporate an additional color, it’s very easy to do.
This technique is perfect for wall hangings, plant hangers, and more!
For this tutorial, I’ve used 5mm cord for the center cords and 3mm cord for the additional outer cords. I’ve found that smaller cord works best for this, especially in wall hangings. Using the same size makes it too crowded.

Step 1
Place the middle of the smaller cord behind the existing cord.

Step 2
Bring the added left cord over the two center cords, then under the added right cord, as above.

Step 3
Bring the added right cord under the two center cords, then pull it through the eye of the number 4.

Step 4
Pull your cord tight to form a half square knot.

Step 5
Mirror the steps above to finish the square knot.

Step 6
Repeat the steps above as many times as necessary, then cut the excess cord and tuck it behind your piece.
I really love this technique as a way to add color to pieces. It can also help you save cord in longer projects, or just unlock new design possibilities.
Other square knot patterns
The square knot is one of the simplest macrame knots, but also one of the most versatile. Here are just a few select variations worth exploring for beginners.
The berry knot

The berry knot (or macadamia knot) is achieved by tying three or four successive square knots, then bringing your central filler cord up and over the top knot. See the image below.

After that, pull it tight and tie another half (or full) square knot below it to keep it in place.
This knot is great for adding texture to wall hangings, and if you didn’t know you’d never guess it’s a simple variation on a standard macrame square knot!
The butterfly knot

This is another simple variation. All you need to do is leave a little space between your square knots as you tie them, as seen below.

Then, simply slide the square knots up the center cords. The bigger the space you leave between knots, the wider the wings will be.
You can use this technique to make macrame feathers and more!
Macrame square knot tips and tricks
If you are having trouble with your square knots, here are a few tips and tricks to help fix any issues you might be having.
How to tell which side to tie next

If you’re not sure which side you’ve tied last, look for the “bump” in the previous knot, as indicated above.
The next square knot should start on that side if you want to continue the pattern.
How to keep your square knots even
If you want to keep your macrame project neat, you need to tighten your knots as you go. You can tie them tighter or looser, but make sure they are the same throughout your piece.
One of the nice things about square knots is that they’re easy to adjust on the fly. And if all else fails, just untie them and start over!
Use a switch knot to swap inner and outer cord

One of my favorite ways to give a piece a unique look is by using color. But with a square knot, the outer cord is the only one that shows.
To get around this, use something called a switch knot. All you need to do is bring the inner cords behind the outer cords, then continue with your square knots.
This is also a great way to allow long strings of square knots to fold, which can be great for utilitarian pieces like keychains and straps.
That’s it for this macrame square knot tutorial! Any more tips or tricks to share? Let us know in the comments!
Leave a Reply