
I don’t know about you, but I really get a kick out of mixed-medium art, and combining ink and watercolor is undoubtedly at the top of my list!
What I love about this approach is that you don’t need to be a skilled illustrator or watercolor wizard.
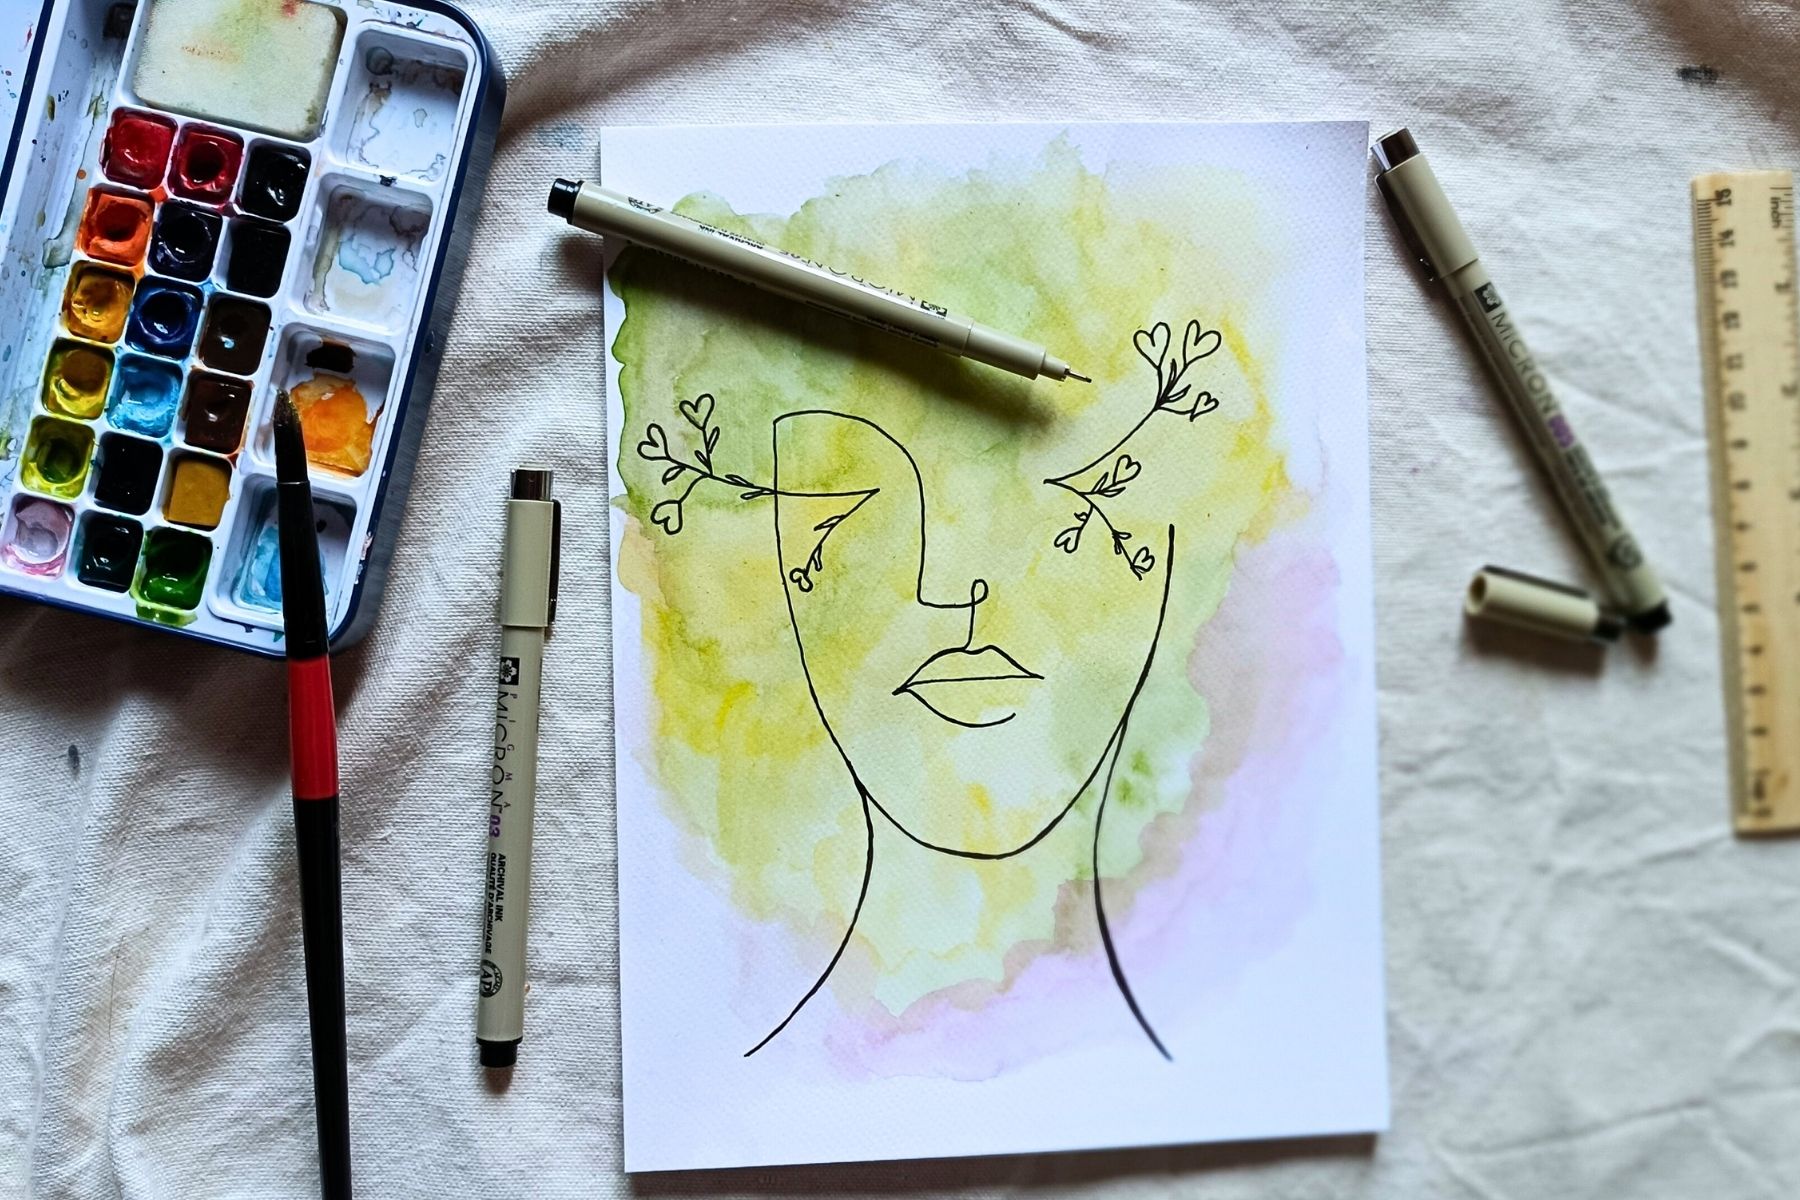
Just a few simple doodles, linework, and minimal watercolor washes can result in exceptionally pleasing display-worthy outcomes.
I’ve shared some essentials on this technique and what I’ve learned in this ink and watercolor tutorial for beginners to help you jumpstart your next venture.
Affiliate disclosure: Articles on Tiny Workshops may contain affiliate links.
Can you combine ink and watercolor?

Yes, you can absolutely combine ink and watercolor. This technique is called line and wash.
This method is all about bringing out the best of both mediums, creating beautiful contrasts that are surprisingly harmonious and seamless.
While watercolor is used to add delicate tonal value and transparency, ink is worked in to provide the opposite: accuracy, detail, and contouring.
However, to get the job done successfully, you’ll need the right materials and supplies, whether pens, watercolor, or paper.
What supplies do I need to combine ink and watercolor?
There are three main supplies you’ll need to combine ink and watercolor: art pens, watercolor, and paper.
In addition, you’ll need all the standard materials required for ordinary watercolor painting — you can find all that entails in our watercolor guide for beginners!
Below, I’ve listed what to keep in mind when purchasing and prepping supplies for your next ink and watercolor projects.
Art pens

You can use a variety of art pens for ink and watercolor artwork, including fineliners, brush pens, and dip pens.
However, there is a golden rule: the ink must be waterproof and water-resistant.
Note that if your pens are water-soluble, they contain water, so pigments will disperse when wet.
Therefore, the key is using pens with water-resistant ink that won’t bleed or smudge whenever in contact with water.
My favorite option for line and wash projects is Sakura Pigma Micron pens. They’re superb fineliners for artists of all skill sets and offer great value for money.
If you want to learn more about these pens and how they work with watercolor, check out the following guides:
- Are Micron pens waterproof? A quick guide to Micron pen ink
- Do Micron pens bleed with watercolor? Mixed mediums tested
Watercolor

Watercolor is very unique in that it’s not quite like any other paint. Although similar to gouache, it’s lighter and more water-soluble, expanding with just a few drops of water.
Because watercolor isn’t the most lightfast, it’s important to select high-quality watercolor paint to ensure your work lasts — especially when incorporating other mediums.
We have an in-depth guide to the best watercolor sets if you’re looking for guidance!
Besides standard sets, watercolor pencils are excellent alternatives for beginners looking for greater control at first.
In addition, Tombow brush pens are easy to learn and are another great pick for watercolor blending effects.
Paper

The best types of paper for ink and watercolor ventures are watercolor paper, mixed-media paper, and Bristol paper.
All of these options are compatible with both ink and watercolor, but because they have different characteristics, you’ll need to evaluate what works best for your project.
Cold press watercolor paper is usually cheaper (good news for beginners!), and along with mixed-media paper, is best if you’re looking to add many layers of washes.
Bristol paper and hot press watercolor paper are smoother and, therefore, best suited for crisp, fine lines and detail.
There are tons of watercolor sketchbooks and watercolor blocks you can find without burning a hole in your pocket. Just make sure to always stick to quality!
Ink or watercolor: What comes first?

Guess what? You can apply ink and watercolor in any order you prefer!
Both methods work beautifully and achieve fantastic results. It’s mostly about your own creative process and how you organically approach your artwork.
Here’s a quick overview of what to expect when applying ink or watercolor first.
Applying ink first
- This is usually a more intuitive approach for experienced illustrators using watercolor for the first time
- This approach allows you to create outlines and guides for paint application
- Ink will seep directly into paper
- Quality ink dries quickly, so you can paint soon after
- Ink may become duller once watercolor is applied, so you may need to trace over lines again for bolder results
Applying watercolor first
- Ink lines will be bolder and darker when applied to watercolor
- Drawing on watercolor may be more difficult depending on your paper, pigment, and pens.
- You need to wait for your paper to dry completely before drawing. This will take a little longer, especially if you’ve applied multiple washes
Watercolor on ink tutorial

And now for the fun part!
Here are the main steps of painting watercolor on ink.
Step 1: Outline your sketches

Before starting your line and wash painting, make sure you have all the necessary materials.
If you’re unsure about your sketching skills or how exactly you want to put down your first lines, use a pencil and eraser to get started.
A metal ruler will also come in handy if you want to incorporate more technical, geometric lines or shapes into your work (see image above)
Step 2: Add detail

Next, start sketching with your art pen!
When creating something more structured, I like to mix in more loosely drawn elements, too.
You can spot this approach in various illustration styles, such as botanical illustration and children’s book illustration.
An easy way for beginners to start out is by mixing basic lines with spontaneous squiggles or doodles. It’s simple to do and will give your work a cool freeform touch!
Step 3: Choose your color palette

Once the ink has dried, gather your watercolor set and paintbrushes and choose your color palette.
You can use as many hues as you want, but if you’re new to this technique, I advise keeping things simple at first.
Starting out with two colors is more than fine (and sometimes more effective!).
Step 4: Apply watercolor washes

Once you’ve selected your colors, it’s time to create your washes.
The wet-on-wet technique is a great way to apply paint for line and wash projects!
Note that washes should be as transparent as possible. Your watercolors should complement — not override — your ink illustrations.
Step 5: Incorporate more details, effects, or touch-ups

Once the paint is fully dry, you can tweak, add detail, or trace over your sketch with different fineliner tip sizes to achieve specific effects.
A fun trick is also to incorporate a non-waterproof pen!
Because this type of ink expands with moisture, it creates an organic, “fuzzy” effect that looks amazing for nature scenes and animal-themed paintings.
Ink on watercolor tutorial

And now, a quick breakdown of how to use ink on watercolor!
Step 1: Choose your color palette

Choose your preferred color palette.
Your palette will vary depending on your subject. For example, if you’re aiming for something more abstract, play with different combinations.
On the other hand, if you’re going to paint something realistic, make sure to select a color palette that matches your theme.
Step 2: Apply watercolor washes

Whether you’re creating something more abstract or more specific, the wet-on-wet technique works equally well.
However, if you’re creating more realistic work, you’ll want to select hues and place color blocks more strategically vs. something more abstract.
For example, if your subject is a country house, add specific color blocks in the areas where you’ll draw each element, such as a roof, door, windows, etc.
Step 3: Sketch/draw

Once your surface is completely dry, you can start drawing away!
The most authentic approach to this technique is to draw loosely, but you can also do more accurate line work if that’s what you prefer (see image above).
Also, if you’re feeling uneasy about your sketching abilities, you can always use a pencil to create basic outlines before putting down your final lines in ink.
Step 4: Add more detail with ink and watercolor

Depending on each project, you may want to add more detail, like more pops of watercolor or bolder pen lines.
You can also add different mediums like gouache if you want to play with paint textures and consistencies.
For example, I applied gouache for the mouth (see image above) since I wanted something a little more opaque to contrast with the delicacy of the washes.
That’s it for this tutorial on how to combine ink and watercolor! Feel free to drop questions or suggestions in the comments below.
Leave a Reply